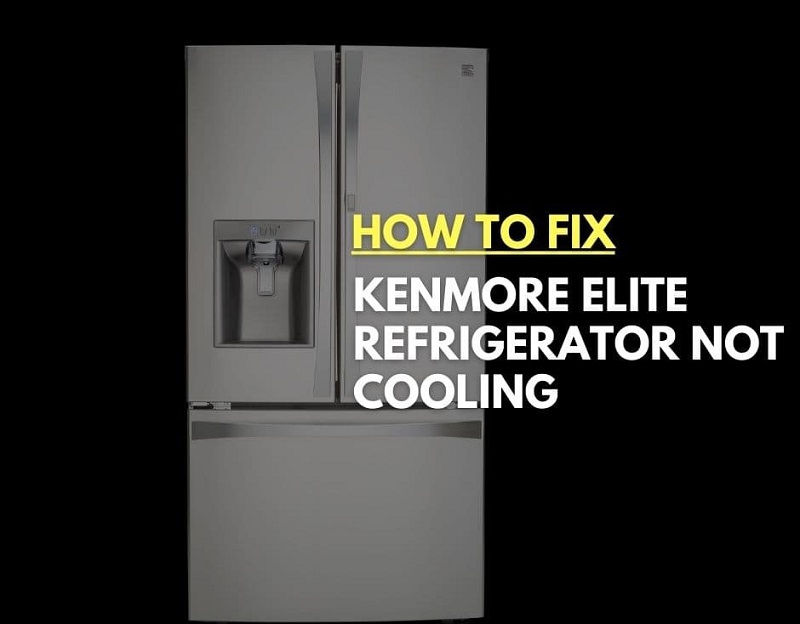
Introduction:
A malfunctioning freezer can quickly escalate from a minor annoyance to a significant source of frustration, leading to potential food spoilage and even financial loss.
If you happen to be the owner of a KENMORE Elite Freezer and discover that it’s not performing up to par, fear not, for there are various potential causes that warrant careful consideration.
In this comprehensive troubleshooting guide, we embark on a journey through the intricate workings of your KENMORE Elite Freezer, shedding light on the common issues that may plague it and providing you with a detailed roadmap of step-by-step solutions to restore its optimal functionality.
So, grab your toolbox and get ready to unravel the mysteries behind a malfunctioning KENMORE Elite Freezer, as we empower you to conquer this inconvenient predicament and restore your frozen delights to their icy glory.
Power Supply Check:
To troubleshoot a non-working KENMORE Elite Freezer, it is crucial to start by examining the power supply. Consider the following steps to ensure a proper power connection:
- Plug the Freezer Correctly: Sometimes, due to accidental bumps or movements, the power cord may become loose, leading to power loss. Double-check the connection to eliminate this possibility.
- Circuit Breaker Inspection: Examine,if any breakers related to the freezer have tripped. If a breaker has been tripped, reset it to restore power to the freezer.
- Power Surge or Interruption: Power fluctuations can disrupt the freezer’s operation and even cause temporary power loss. In such cases, the freezer might require manual intervention to reset and resume normal functioning. Refer to the user manual for specific instructions on resetting the freezer after a power interruption.
Temperature Settings:
- Adjusting Temperature Control: Check the temperature control settings on your freezer. The location of the temperature control dial or buttons may vary depending on the model. Consult the user manual to locate the temperature control mechanism specific to your freezer.
- User Manual Reference: Refer to the user manual provided by KENMORE for the recommended temperature range suitable for your freezer. The user manual will offer guidance on the ideal temperature settings based on the type of food being stored.
- Fine-Tuning the Settings: Once you have determined the recommended temperature range, adjust the temperature control accordingly. The dial or buttons typically allow you to increase or decrease the temperature setting. Ensure that the adjustment is within the suggested range for optimal food preservation.
- Allow Sufficient Cooling Time: After adjusting the temperature settings, it is important to allow the freezer sufficient time to reach the desired temperature. Freezers typically take a few hours to stabilize at the set temperature. Avoid opening the freezer frequently during this period to maintain consistent cooling.
- Temperature Monitoring: Use a reliable thermometer to monitor the temperature inside the freezer. This will help you ensure that the actual temperature aligns with the set temperature on the control panel. Regular temperature checks can also alert you to any potential issues or fluctuations.
- Adjustments Based on Usage: Consider adjusting the temperature settings based on the contents and usage patterns of your freezer. For instance, if you frequently add or remove a large quantity of food, you may need to lower the temperature slightly to compensate for the temporary rise in temperature.
- Seasonal Adjustments: During extreme weather conditions, such as hot summers or cold winters, the ambient temperature in the environment can impact the freezer’s cooling performance. In such cases, you may need to make slight adjustments to the temperature settings to maintain optimal cooling.
Condenser Coils:
- Locate the Condenser Coils: Depending on the model, the condenser coils are usually found at the back of the freezer or underneath it. Consult the user manual or visually inspect the appliance to locate the coils.
- Dust and Debris Removal: Use a vacuum cleaner with a brush attachment or a coil brush specifically designed for cleaning condenser coils. Gently brush away the accumulated dust and debris from the coils. Start at the top and work your way down, covering the entire surface area of the coils.
- Thorough Cleaning: For stubborn dirt or grime, dampen a cloth or sponge with mild soapy water. Wring out excess moisture to avoid dripping water onto the coils. Carefully wipe the coils to remove any remaining residue or buildup. Take care not to apply excessive force that could damage the delicate coils.
- Clean the Surrounding Area: While cleaning the condenser coils, take the opportunity to clean the area surrounding them. Remove any loose dirt or debris that may obstruct proper airflow and cooling.
- Regular Maintenance: To maintain optimal performance, it is recommended to clean the condenser coils at least twice a year or more frequently if you have pets or live in a particularly dusty environment.
Door Seal Inspection:
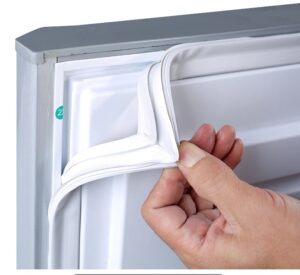
- Visual Inspection: Carefully examine the door seal for any visible signs of wear, cracks, or damage. Look for tears, gaps, or distortions that may indicate a compromised seal. Even small cracks or splits can significantly impact the freezer’s ability to maintain consistent temperatures.
- Cleaning the Door Seal: Over time, dirt, debris, and food particles can accumulate on the door seal, affecting its effectiveness. Clean the door seal using a mild detergent or a mixture of warm water and vinegar. Gently wipe the seal with a soft cloth or sponge, ensuring all dirt and residue are removed. Pay close attention to the crevices and grooves of the seal to ensure a thorough cleaning.
- Inspecting the Freezer Surface: While cleaning the door seal, take the opportunity to inspect the corresponding area on the freezer where the seal makes contact. Look for any debris, ice buildup, or sticky substances that may hinder the proper sealing of the door. Use a damp cloth to remove any dirt or residue, and ensure the surface is clean and dry before closing the door.
- Testing the Door Seal: To check the integrity of the door seal, perform a simple test. Close the freezer door and insert a sheet of paper between the seal and the freezer body. Gently tug the paper. If you can easily remove it without resistance, it indicates a poor seal. Repeat this test at various points around the door to identify any areas where the seal may be compromised.
- Addressing Damaged Seals: If you notice significant wear, cracks, or gaps in the door seal during inspection, it is crucial to address the issue promptly. A damaged seal cannot effectively maintain the internal temperature, leading to increased energy consumption and potential food spoilage. In such cases, it is recommended to replace the door seal with a compatible replacement part. Consult the user manual or contact the manufacturer for guidance on obtaining the appropriate replacement seal for your KENMORE Elite Freezer model.
- Installing a New Door Seal: When replacing the door seal, carefully follow the manufacturer’s instructions or seek professional assistance if necessary. Ensure the new seal is aligned properly and securely attached to the freezer door. Double-check that there are no gaps or misalignments that could compromise the seal’s effectiveness. A properly installed door seal will provide optimal insulation and help maintain the freezer’s cooling efficiency.
OTHER POSSIBLE REASONS:
Defrosting Issues:
- Check if the freezer is in need of defrosting.
- If there is excessive frost buildup, manually defrost the freezer following the manufacturer’s instructions.
- Once defrosted, monitor the freezer to see if the issue persists.
Evaporator Fan:
- Ensure that the evaporator fan is running smoothly.
- If the fan is not working, it may result in inadequate cooling.
- Listen for any unusual noises or lack of airflow, which could indicate a faulty fan that
Overcrowding and Air Circulation:
- Check the freezer’s contents to ensure it is not overcrowded.
- Overpacking can restrict proper airflow, leading to temperature imbalances.
- Rearrange items to allow adequate air circulation and ensure that vents are not blocked.
Faulty Thermostat:
- Inspect the thermostat for any visible damage or loose connections.
- If the thermostat is malfunctioning, it may not accurately control the freezer’s temperature.
- Consider contacting a professional technician to diagnose and replace the faulty thermostat.
Professional Assistance:
- If all troubleshooting attempts fail to resolve the issue, it is recommended to seek professional assistance.
- Contact KENMORE’s customer support or schedule a service call with a certified technician.
- Professional technicians have the expertise to diagnose and repair complex issues with your KENMORE Elite Freezer.
Conclusion:
A malfunctioning freezer can be frustrating, but with the help of this troubleshooting guide, you can identify and resolve common issues affecting your KENMORE Elite Freezer.
By following the step-by-step solutions mentioned above, you can potentially save time and money by fixing the problem on your own.
Remember to always prioritize safety and consult the user manual or seek professional assistance when necessary. A properly functioning freezer will ensure your food stays fresh and your peace of mind remains intact.


